by DanielPopescu | Aug 18, 2019 | GDPR, Microsoft 365, Office 365
Let’s just say that you are IT admin for your company, and you have to allocate a lot of time for managing storage for your email solution. As we all know, usually employees are sending a lot of documents as attachments. And who can blame it? We all, are depending on working with customers and partners, so we have to share documents or other type of files.
Still for IT, Security and Compliance teams, those attachments mean allocating effort and budget for bigger storage (if using on-prem email solutions) and also for monitoring them.
Not to mentions that for small companies this effort is too much.
There are also other disadvantages for your employees, your partners or clients:
- It is difficult to find the latest shared version of a file
- It is difficult to have an overview of files shared with a partner/client
- Each attachment means higher chances to have a full mailbox (Yes! This apply for them as well!)
- Higher chances to make mistakes like: “Ops, I forgot the attachment!”
Therefor giving the employees a solution to share documents with external without using emails I am sure it will be highly appreciated.
In this article I am showing you what steps needs to be done on SharePoint Online in order to allow sharing documents with external and auditing who shared external.
Please keep in mind that below settings are done at a tenant/organization level. For each site you can have different settings but not more “relaxed” that tenant level.
First step would be to configure SharePoint site to allow external sharing. So:
In order to be able to configure the external SharePoint access you need to be Global admin or SharePoint admin. So, please check the role for the user who will make all the changes.
Then sign in to https://admin.microsoft.com as a global or SharePoint admin.
- In the left pane, under Admin centers, select SharePoint. (You might need to select Show all to see the list of admin centers.)
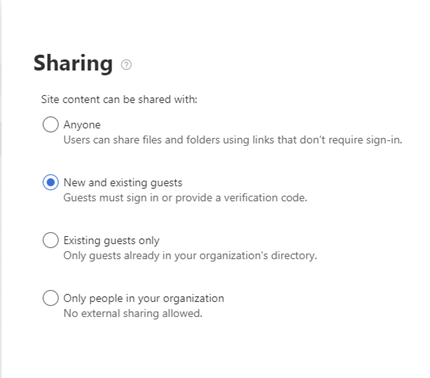
- Here you have options to allow or restrict external sharing both for SharePoint and OneDrive for Business. Keep in mind that OneDrive permissions cannot be more relaxed than SharePoint permissions. Just move the slide to your desired permission level. Personally, I recommend setting it up to maximum “New and existing guests”.

-
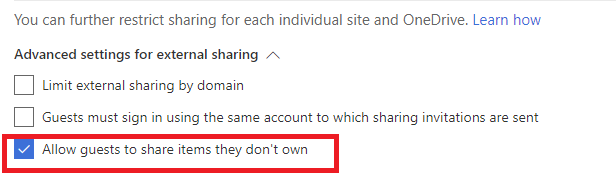
Now click on “Advanced settings for external sharing”. Here you can limit the sharing process to only specific domains.
Also, I would recommend looking on last checkbox! By default, is On! Are you sure you want to permit to your external to giver access to other people?
-
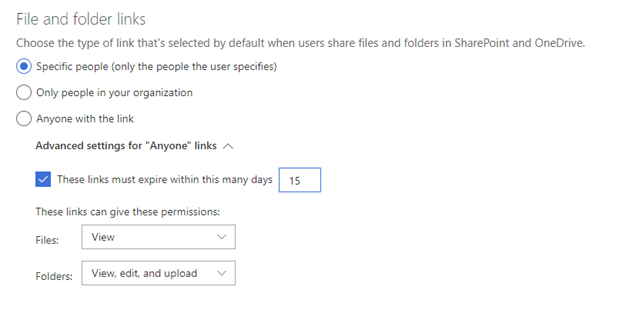
Next, you can configure the Default options for sharing. From my experience, people will do the minimum configuration during sharing process in order to send the information as soon as possible. They will not allocate time for re-check the security settings. So, these default settings are very important.
I am usually using “Specific people (only the people the user specifies)“, I am also configuring an expiration period and permit only View rights for files.
Note: Below screenshot appears when the most permissive settings have been configured in Step 2. In case you have configured less permissive (some settings will not be available).
-
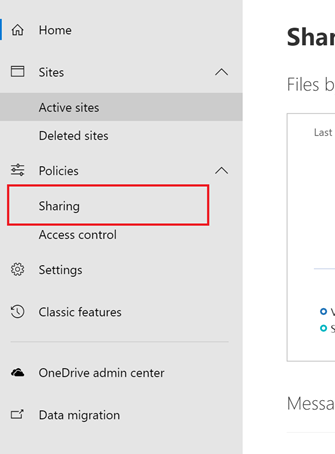
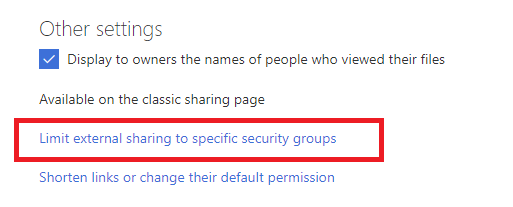
Next, in case you want to be sure that only some people from your organization will be able to share documents with external, there is a button for this also.
Just click on “Limit external sharing to specific security groups”
-
You will be redirected to another page (from SharePoint classical interface). Here you will find some settings that you already configured in previous page but also, one very useful one. You can decide who are the employees that can share with externals. All you have to do is to create a security group with dedicated people.

- Press OK and you have finalized the SharePoint tenant permissions.
-
Now, you can make fine-tuning for each team site. Go back to SharePoint admin center, select Active sites, and select the team site you want to configure:
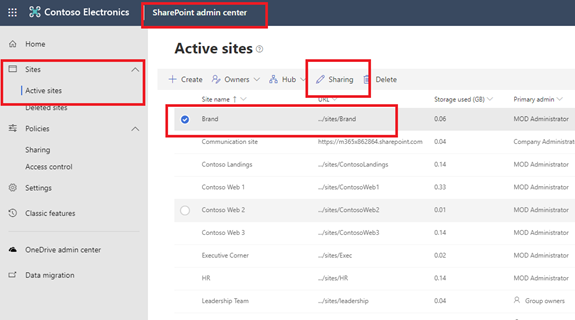
-
With your site selected, press Sharing and select the level of permission:
In my next article I will show you how to monitor this external sharing activity (useful also for GDPR).
That’s all!
by DanielPopescu | Jul 14, 2019 | GDPR, Microsoft 365, Office 365
I am seeing more companies that want to migrate to Microsoft 365 (Business or Enterprise). During preliminary discussions, clients are concerned about what they should do with existing emails during and after Microsoft 365 implementation. The answer is quite simple: you should clean your mailbox from unnecessary emails and then, import all emails in Exchange Online.
Let’s see how this can be done:
Let’s just say that you are IT administrator for a company, or responsible to managing company email solution. Also, you decide to migrate from an old environment to Microsoft 365. Why? Mainly because, thanks to GDPR, you have no other choice but to be in control on how employees are working with files that has customer data and Microsoft 365 is giving you an excellent solution to fulfill GDPR IT requirements. Of course, customer’s data are also in emails.
Probably the easiest way to control business files usage, is to have all data in Microsoft 365 environment. Files from local infrastructure are quite easy to be migrated to OneDrive for Business or SharePoint. Emails however are a different story.
In this article I will focus on how to migrate emails from local pst files to Exchange Online.
Prerequisites:
- Have a Microsoft 365 or Office 365 subscription
- Have Azure AZCopy installed on your computer
- Have the possibility to collect all pst files to an accessible location
- Know which pst file goes in which user’s mailbox
Emails exists typically in two locations: on the server and in local files like pst files (or other offline type of files).
How to import emails stored on your existing email server?
You have several options:
- Use migration tool from Exchange admin center
Personally, I prefer to use third-party tools for several reasons, but I will go into details some other time.
How can you import emails stored on local pst files?
Well, Microsoft added a tool in Office 365 specific for helping you to import email from pst files.
Let’s see how it works.
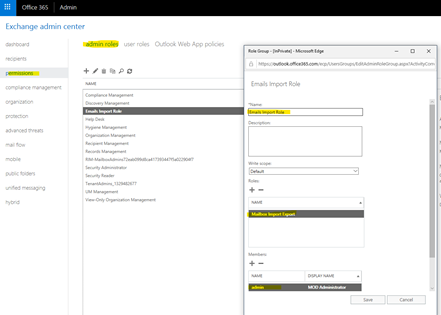
To be able to use this tool you need to be assigned the Mailbox Export role in Exchange Online. So, let’s do this:
- Go to www.office.com and press admin tile
- In admin centers click on Exchange
- Click on admin roles
- Click on + sign
-
Add Name for this role and assign users in charge with creating jobs for importing emails.
Now, you need to wait. It can take up to 24 hours until this changed will be applies and to be able to create jobs.
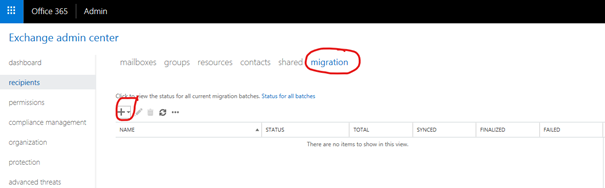
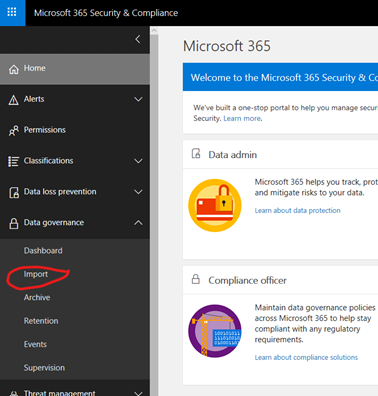
Now, go to Security and Compliance center (found in Admin centers section). Alternatively, you can go directly to https://protection.office.com . Here, click on Data governance and choose Import.
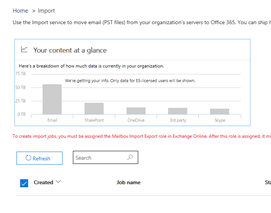
I have added below the menu available before and after the Emails Import role has been configured.
Before:
|
After (as you can see you will have a new button New Import Job: |
 |
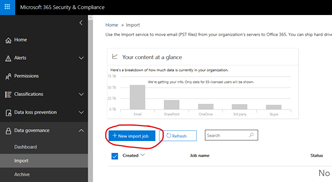
|
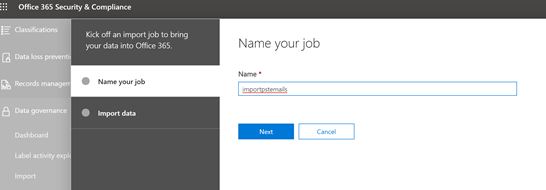
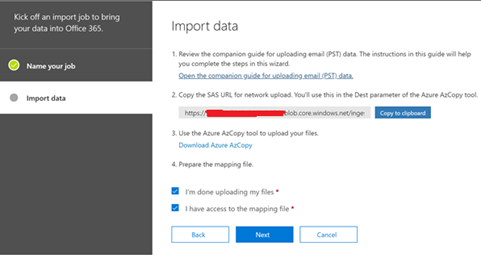
- Now press on New import job
- Enter the name for your job (no CAPS allowed – I hope this will be allowed in the future) and press Next
- Depending on how many data you want to import you have two possibility. Let’s select Upload your data

- Press on Show network upload SAS URL
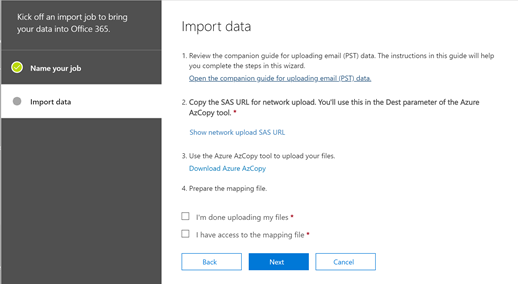
- Copy SAS URL to clipboard. You will need it for copying your pst files to it when using Azure AZCopy

-
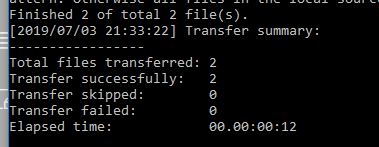
Open Command Prompt and run Azure AZCopy. When finished you should see a transfer summary. Check that the number of successful files transferred is equal with number of pst files you want to import and there are no failed transfer files.
AzCopy.exe /Source:<Location of PST files> /Dest:<SAS URL> /V:<Log file location> /Y
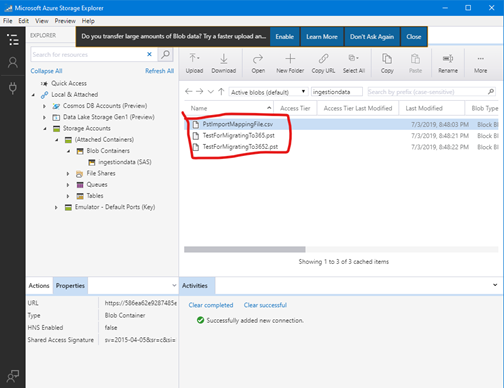
If you want to check that you pst files has been imported in Azure storage, you can use Azure Storage Explorer tool. You can use it for viewing only not for importing!
- Now, we need to “tell” Microsoft which pst file map with what Microsoft 365 user. To do this, we will use, of course, a csv file. So, coming back to Microsoft 365 tenant windows, select checkboxes from step 4 (see below). Press Next.
-
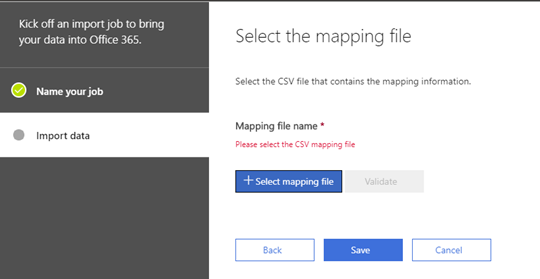
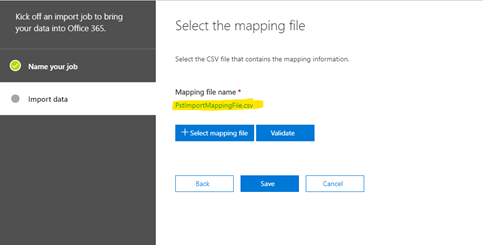
Select mapping file (csv file) and press Validate. Process will not go forward until validation completes.
Header for pst file is below:

- After validation press Save.
- Close
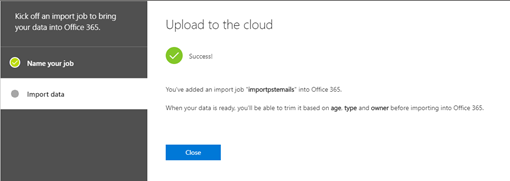
- If everything works well, you should see Ready to import to Office 365 message in progress bar.

- Press Ready to import to Office 365.

- Press Import to Office 365.
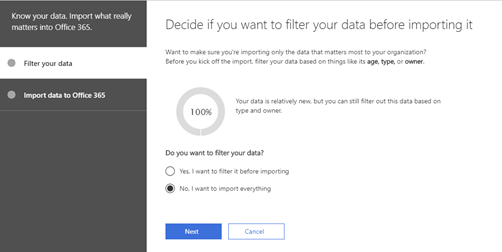
- You have the possibility to filter data that you want to import. Let’s say that we want to import everything. Select No, I want to import everything and press Next.
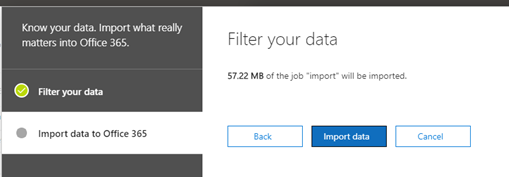
- After analyzing pst and csv file press Import data
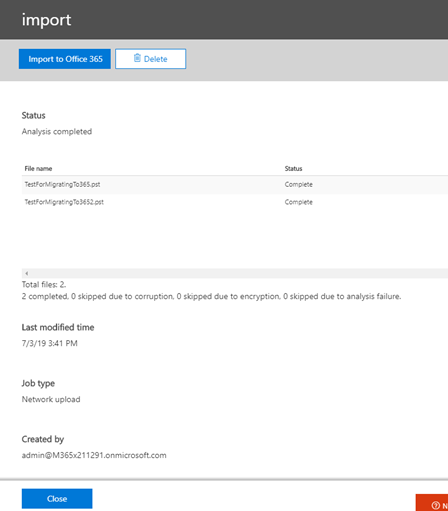
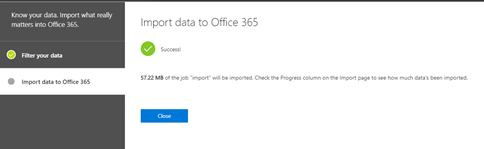
- After migration press. Close.
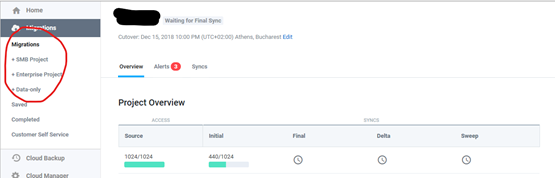
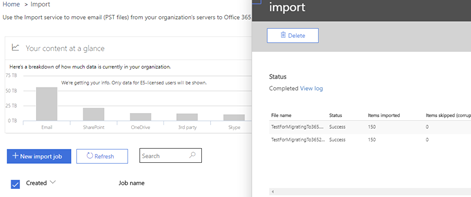
- If you want to go into details on emails imported select job and look in details. You will see items imported, skipped etc.
I hope this process helps you to have a successful migration to Microsoft 365.
Recent Comments